This post will help you if you are testing an API, you are at the recon stage and you want to generate your own OpenAPI 3.0 documentation for your target, which you can then open as a collection in Postman to start probing for vulnerabilities. Here, we are going to use Firefox’s developer tools and a command line tool called mitmproxy2swagger.
If you have absolutely no clue what I’m talking about, I suggest you check out the API Security Certified Expert course which is a great starting point for anyone interested in API hacking.
Working in Firefox
People will usually use mitmweb and mitmproxy2swagger for what we want to do here, but a number of us have had a hard time getting mitmweb to work correctly.
Here is a workaround using Firefox’s developer tools.
Before anything else, if you happen to be proxying your traffic through a tool like Burp Suite, turn it off (if your are using FoxyProxy, just uncheck FoxyProxy in the Firefox main bar).
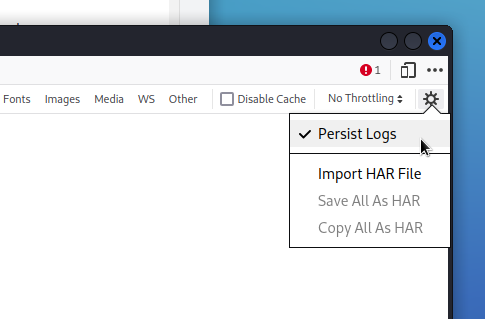
Then open the developer tools window and select the Network tab. Click on the gear wheel icon at the far right of the Network tab’s sub-bar and make sure Persist Logs is selected.
Go back to Firefox’s main window and visit meticulously all the pages of your target web app. Use all the features (create a new user, log in, change parameters, etc).
The point is to catch all the possible API endpoints you wish to add to the OpenAPI 3.0 documentation file (also called Swagger file). You should see the Network tab in the dev tools window populate with all the traffic.
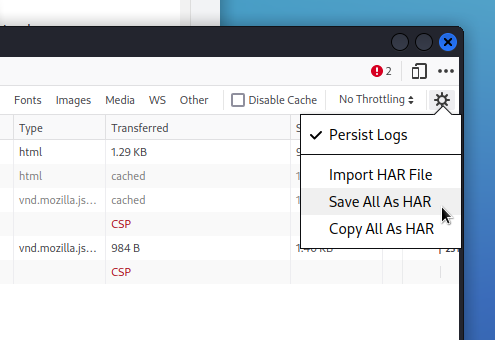
When you’re done visiting the app, switch back to the dev tools’ Network tab, click on the gear wheel icon once again and choose Save All As HAR.
Switching to mitmproxy2swagger
Make sure you have mitmproxy2swagger installed (if not, you’ll find instructions here).
Open a terminal window and navigate into the directory where you saved the HAR file. Then run:
sudo mitmproxy2swagger -i file.har -o spec.yml -p http://192.168.1.28 --format har
where:
file.har is the name of the file you output from Firefox at the step above.
http://192.168.1.28 is the IP address of the app you’re targeting
The above command generates an OpenAPI 3.0 documentation named spec.yml.
Now you need to open this file in a text editor (I use nano) using sudo.
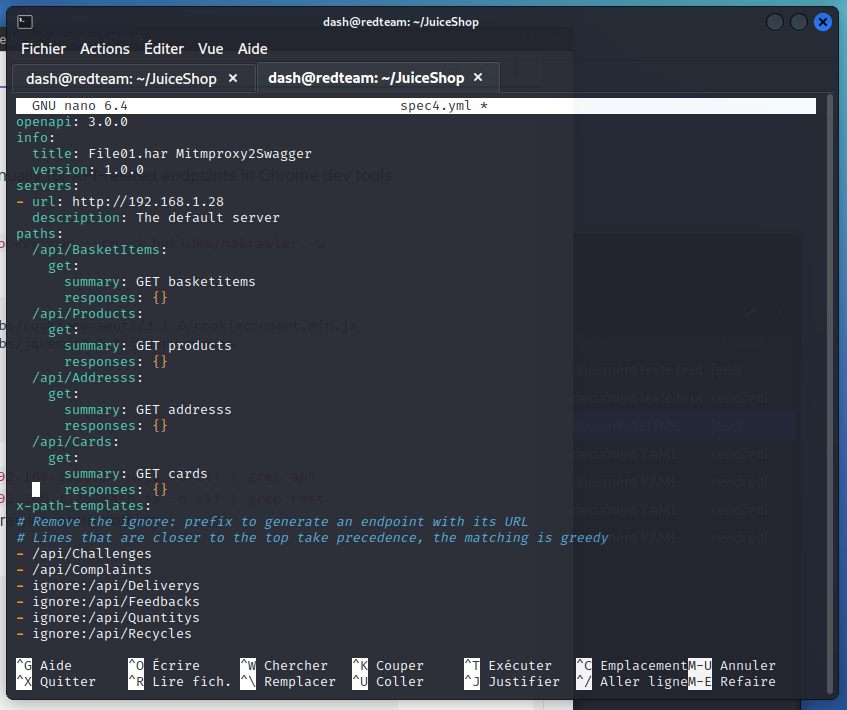
In the file, you will see a list of endpoints that mitmproxy2swagger has marked as ignore. These will not be included in the documentation. So review these items and if there are some that you do want included in the documentation, edit the line to remove the ignore: section.
While you’re there, you can also change the title of the file if you wish to do so.
Now save the file and leave the text editor.
Then run mitmproxy2swagger a second time, adding the --examples flag:
sudo mitmproxy2swagger -i file.har -o spec.yml -p http://192.168.1.28 --format har --examples
Your OpenAPI 3.0 documentation file is now ready.
Double-checking the documentation file
If you want to validate the content of the file, go back to your browser and visit https://editor.swagger.io/
Import the spec.yml file you generated at the step above, using File > Import file.
You can now check every endpoint manually.
If you’re happy with the result, you can finally import the spec.yml file as a collection in Postman and start poking around the API.
As a final note, you will find a more in-depth description of this entire process, also with more context, in this post by SilverStr.
Have fun!